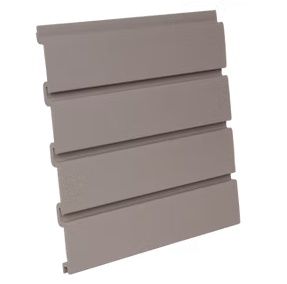
The Best of Our Features
Holds 100lbs per sq ft
100% Recyclable, Made With Responsibly Sourced Materials
Scratch-Resistant With Consistent Pigmentation Throughout Material
Color-Coordinated
Screws + Trim
Easy To Clean Smooth
Satin Finish
Water And Moisture Resistant
Take 10% off when you spend $2500+ on Handiwall or Accessories

Durability
Holds 100Lbs per square foot and is scratch, water, and moisture resistant
Flammability
Fire tested by an independent laboratory (ASTM E84 Test), and ranks HandiWALL® in Grade A (index of 15) for flame spread
Quality
Manufactured in the USA under strict quality protocols with consistent pigmentation throughout
Sustainability
100% recyclable, made with responsibly sourced materials
HandiWALL®
Transform your space with HandiWALL®—made in the USA with 100% recyclable, responsibly sourced materials. Built to hold up to 100 lbs per square foot, our durable and scratch-resistant panels ensure optimal functionality. Quick and easy to install, HandiWALL® offers a sleek satin finish that resists water and moisture, making it ideal for any environment.

DIY: How To Install It?
To ensure a smooth and professional installation of your HandiWALL® slatwall system, it’s important to measure where you intend to install the slatwall panels on the wall. This will help you determine the number of HandiWALL® panels needed and their optimal placement.

Once you have your measurements, use a stud finder to locate the strongest areas on the wall. These are the ideal spots to screw your HandiWALL® panels into, ensuring a secure and stable installation. Mark these spots with a pencil or tape to serve as your reference points during the installation process.

Begin the installation process by attaching the first HandiWALL® panel to the wall. Starting from the bottom and working your way up will help maintain a level and uniform appearance. Use the marked stud locations to guide you as you screw the panel into place, ensuring it is securely fastened to the wall.

After securing the first HandiWALL® panel, proceed to install the trim around its perimeter. This trim will not only enhance the appearance of your HandiWALL® system but also serve as a guide for aligning the edges of subsequent panels.

Next, stack, align, and screw the following HandiWALL® panel on top of the first one for a seamless look. Continue this process, stacking and screwing each HandiWALL® panel in place until all panels are securely attached to the wall.

Once all panels are in place, finish by applying the remaining trim around the perimeter of the HandiWALL® system. This final touch will give your installation a polished and finished appearance, completing the overall look of your HandiWALL® slatwall system.


